
Configuring Authentication for Authors
Enable Authentication for Authors
By default, authors don’t need to be logged in in order to use AEM via Sidekick. In order to enable authentication, it is sufficient to add relevant access-statements to your site configuration. Upon encountering said access-statements, the Sidekick will enforce authentication with the respective provider: Microsoft for Sharepoint based projects, and Google for Google Drive based projects.
Step 1: Add Access Allow To Configuration
Use the configuration service to update the access/admin section of your site configuration.
Add admin/role/author and or admin/role/publish array properties for each individual user or wildcard-domain you’d like to give access to the site for.
Example for an individual user: admin/role/publish: [ "some.user@example.com" ]
Example for a wildcard domain: admin/role/author: [ "*@example.com" ]
The following example would grant author access all users within the “example.com” domain and publish rights to a the single user “some.user@example.com”:
curl -X POST https://admin.hlx.page/config/acme/sites/website/access/admin.json \
  -H "content-type: application/json" \
  -H "x-auth-token: <your-auth-token>" \
  --data '{
	"role": {
         "author": [ "*@example.com" ],
         "publish": [ "some.user@example.com" ],
	}
}'
Ensure that the users are able to authenticate themselves using their login credentials as follows:
- If using Google Drive, they must be able to authenticate with their credentials using Google authentication.
- If using Microsoft SharePoint, they must be able to authenticate with their credentials using Microsoft authentication.
Step 2: Login via Sidekick
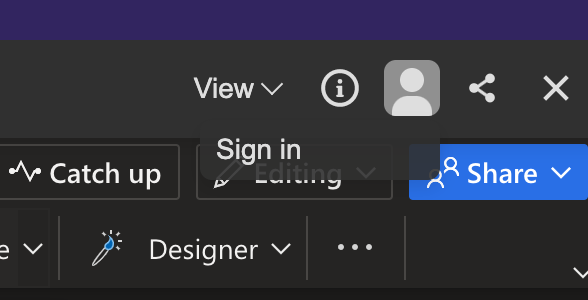
Once you click it, it will open a new browser tab, redirecting to your respective provider:
The first time, it will ask for consent that the Admin service can access your Sharepoint or Google data. In case you are not an admin on the account, you will see the following message:
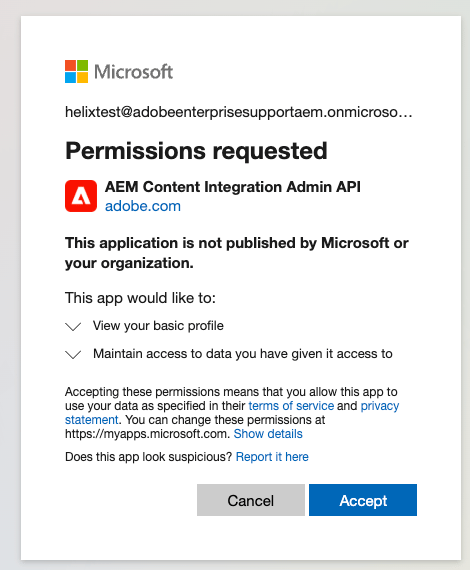
In this case, ask an Active Directory admin of your organization to login via Sidekick or directly via the admin link: https://admin.hlx.page/auth/microsoft
The admin can either grant consent directly by checking the ‘Consent on behalf of your organization’ when they log in, or later via the Azure Portal.

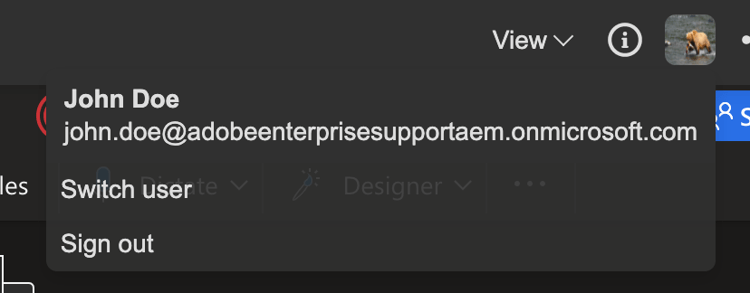
Step 2 (Alternative) Granting Admin Consent via Azure Portal
In order to grant admin consent, open the Azure portal and go to:
Home → Active Directory → Enterprise Application s
(Note that the application is only visible, if an admin has logged in in the steps above)
Search for the AEM Content Integration Admin API:
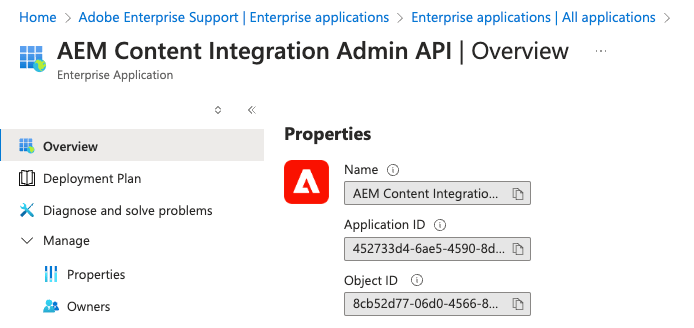
It should have the application id shown above.
Select the Permissions tab (below security):
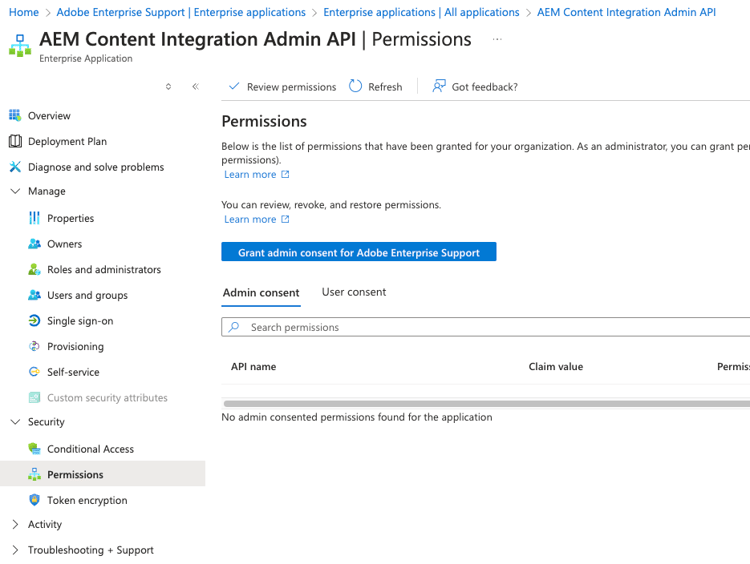
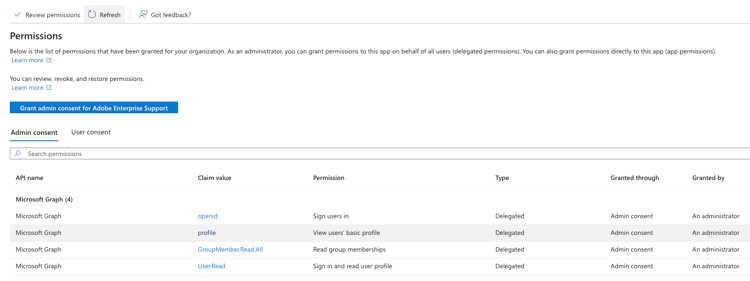
Grant admin consent for {your organization}.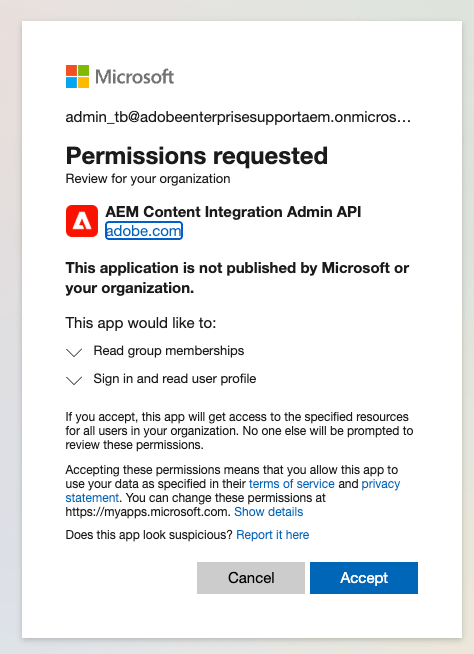
Using the Admin Service (admin.hlx.page)
When authentication is enabled for admin.hlx.page using the API endpoint with tools like curl will require to use a proper auth token. For one time ad-hoc use by developers it is very convenient to just copy/paste the x-auth-token header from your browser's network tab from an authenticated request sent by sidekick to admin.hlx.page and pass it into the curl via the -H option. eg:
curl -v -H "x-auth-token: id_token=..." "https://admin.hlx.page/status/{org}/{repo}/main/?editUrl=auto"
Define user roles without enforcing authentication
By default, as soon as the role mapping is defined via an admin/role/* entry, authentication is enforced on that project. It might be desirable to allow unauthenticated access but still be able to define a user mapping, for example give a user the admin role.
The requireAuth property can be used for this with the following values:
autois the default and enforces authentication as soon as a role mapping is defined.truewill always enforce authenticationfalsewill not enforce authentication
Example:
Give the user bob@example.com the admin role but don’t enforce authentication:
curl -X POST https://admin.hlx.page/config/acme/sites/website/access/admin.json \
  -H "content-type: application/json" \
  -H "x-auth-token: <your-auth-token>" \
  --data '{
	"role": {
         "admin": [ "bob@example.com" ]
	},
       "requireAuth": false
}'
Default Roles
If no role mapping is configured, the admin uses default roles to determine the permissions of the request. The default role can be specified using the admin/defaultRole property.
By default there are no default roles, unless requireAuth is auto, in this case the default role is basic_publish (see below). Example:
Use publish as default role:
curl -X POST https://admin.hlx.page/config/acme/sites/website/access/admin.json \
  -H "content-type: application/json" \
  -H "x-auth-token: <your-auth-token>" \
  --data '{
       "defaultRole": "publish"
}'
Evaluation
The effective roles of a request are evaluated as follows:
- If a request isn’t authenticated and
requireAuthistrue, a401status code is returned. - If a request isn’t authenticated and
requireAuthisautoand role mapping is defined, a401status code is returned. - If a request isn’t authenticated the
defaultRoleis used. - If a request is authenticated and no role mapping is defined, or if
requireAuthisfalse, thedefaultRoleis used. - If a request is authenticated and role mapping is defined and
requireAuthis notfalse, the roles that match the user are used.- If no mapping matches, the user will have no role; effectively always returning a
403status code. - If several mapping matches, the user will have a combined set of roles
- If no mapping matches, the user will have no role; effectively always returning a
Admin Permissions
| Permission | Purpose |
cache:write |
Purge cache |
code:read |
Read code status |
code:write |
Update code |
code:delete |
Delete code |
code:delete-forced |
Delete code (forced) |
config:read |
Read all config |
config:read-redacted |
Read redacted config |
config:write |
Update config |
index:read |
Read index matching |
index:write |
Reindex |
preview:read |
Read preview information |
preview:write |
Update preview |
preview:delete |
Delete preview resources |
preview:delete-forced |
Delete preview resources (forced) |
preview:list |
List preview resources |
edit:read |
Read edit status |
edit:list |
List edit resources |
live:read |
Read live status |
live:write |
Update live resources (publish) |
live:delete |
Delete live resources |
live:delete-forced |
Delete live resources (forced) |
live:list |
List live resources |
cron:read |
Read cron job config |
cron:write |
Update cron job config |
snapshot:read |
Read snapshots |
snapshot:write |
Update snapshots |
snapshot:delete |
Delete snapshots |
job:read |
Read job information |
job:write |
Start jobs |
job:list |
List jobs |
log:read |
Read logs |
log:write |
Write logs (append) |
Admin Roles
| Role | Permissions |
admin |
|
basic_author |
|
basic_publish |
|
author |
|
publish |
|
develop |
|
config |
|
config_admin |
|
Further Reading
If you have set up the Configuration Service for your site, then you can use the following API operations to configure permissions for authors:
- Create Site Configuration (applies to a single site)
- Update Site Configuration (applies to a single site)
- Create Profile Configuration (applies to multiple sites)
- Update Profile Configuration (applies to multiple sites)
In each of these API requests, you will use the fields
groups(with the GroupsConfig schema) to define groups and assign group membersaccess.admin(with the AdminAccessConfig schema) to assign access permissions to groups or users